

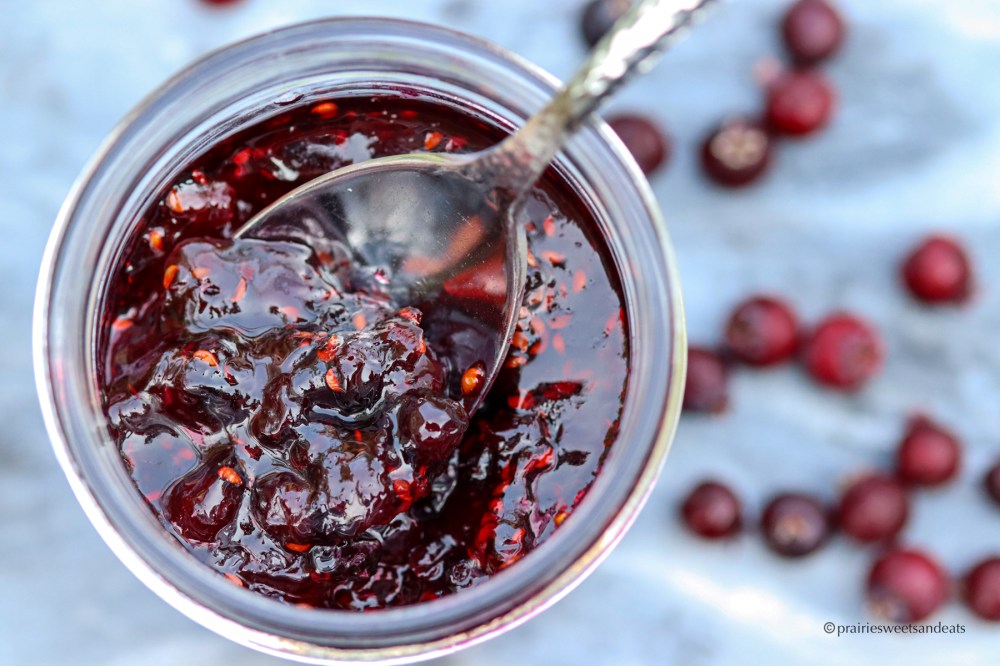
This homemade old fashioned saskatoon jam will sure to delight your taste buds and take you back to your childhood. With just a few ingredients, anyone can make this rich delicious jam from scratch. Loaded with freshly picked vibrant saskatoons (also known as service berries or juneberries) gives this jam that sweet apple-almond berry flavor.
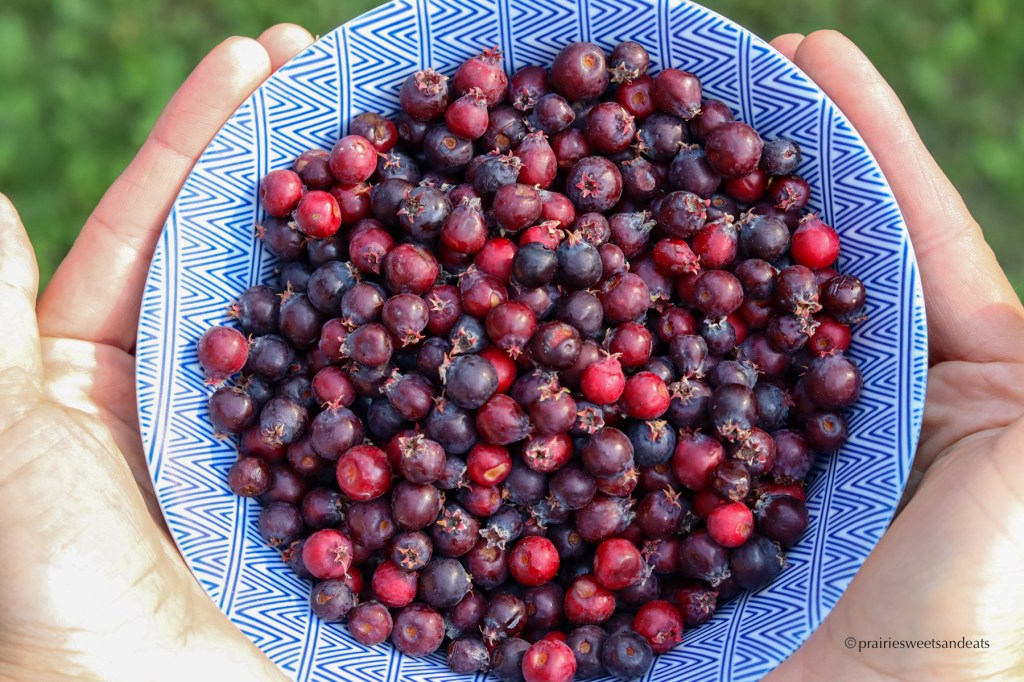
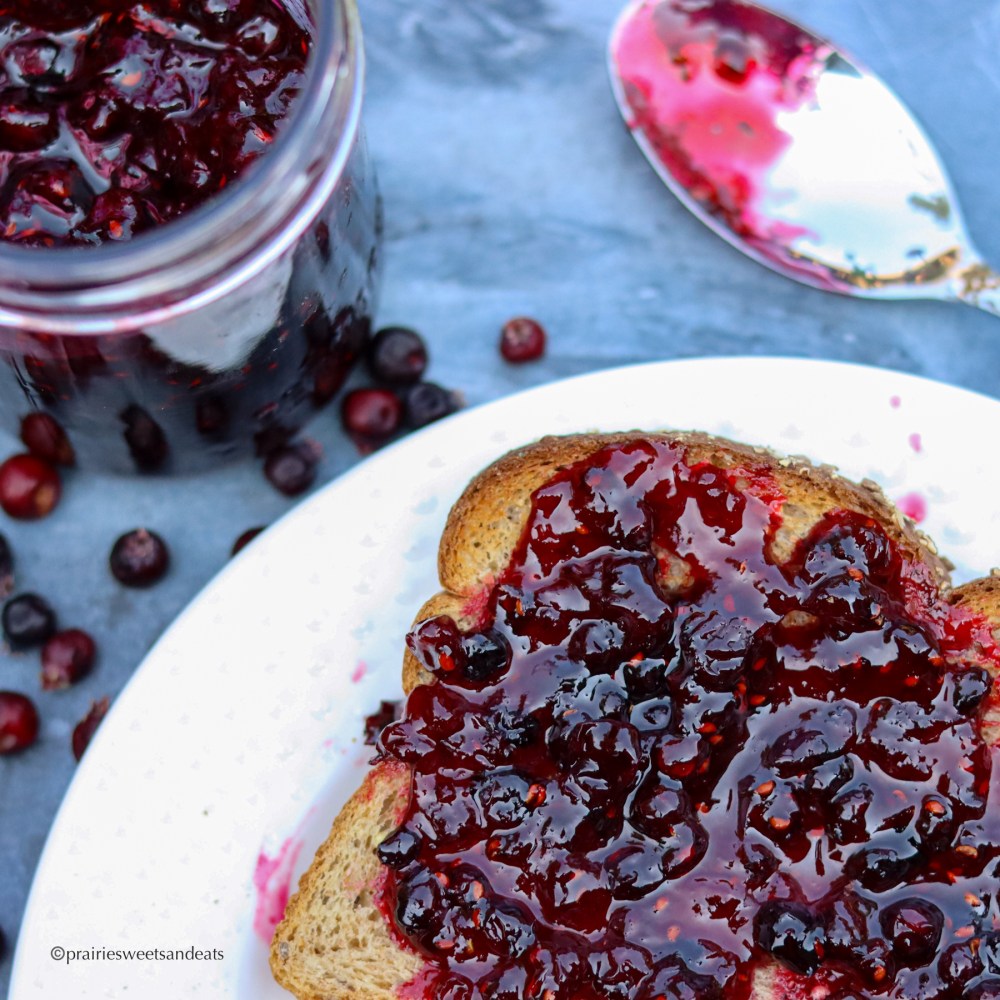
I make several batches of saskatoon jam every year and we eat every last bit of it! Perfect for slathering on toast, English muffins, your morning oatmeal, or top off your ice cream for a sweet finish to your day.
What is Pectin?
Pectin is a naturally occurring starch that helps thicken up preserves such as jams and jellys. When heated it helps provide structure to jams and jellys making give it it a nice spreadable consistency.
Certain fruits are known to have more pectin than others which gels more easily and doesn’t require added pectin. However pectin is tricky because the level of pectin not only depends on the fruit, but the degree of ripeness in that fruit. The more ripe the fruit, the less pectin it will have. If you measured the level of pectin in a ripe plumb versus an unripe plumb, the level of pectin would be different.
Fruit with high pectin: Apples, lemons, limes, plumbs, gooseberries.
Fruits with low pectin: Strawberries, blueberries, raspberries, blackberries, rhubarb, oranges, grapes, peaches.
What equipment to do I need for a water-bath?
You do not need a special canning pot in order to can jars using a water-bath. As long as you have a stock pot big enough and tall enough to place a couple jars in, and a few essentials, you are good to go! Here is a list of the essentials I use to complete the canning process.
- Mason canning jars. Jars come in a variety of shapes and sizes, I like to use 250ml jars for jams and jellies. If you are re-using your jars, check to make sure your jars have no cracks or chips, also check your sealing disks and screw bands to make sure they are in excellent condition with no nicks or rust. Many people suggest to use new lids each time you jar something new, however I will re-use my lids until I feel they are no longer safe, and will not seal. Don’t forget to sterilize your jars before filling with jam.
- Wide mouth canning funnel. While not needed, it certainly is helpful in preventing unnecessary spills when filling up your jars.
- Jar lifter. When your jam is done, you will have to lift the jars out of the water bath. a Jar lifter grips the jars so you can safely remove them from the pot.
- large stock pot with lid. The stock pot I use is a lagostina 17L stock pot. Its the same pot I use to make many homemade soups.
- Canning rack. A canning rack prevents the jars from bouncing around inside the pot which can lead to breakage. It also helps keep the jars in place for better water circulation. I use the rack that came in my instant pot. You may also purchase a canning rack.
- Wood cutting board. I use an 18″ x 12″ wood cutting board to cool my jars on for the 12-24 hr resting period.
How do I sterilize Jars and Lids?
Before you beginning making your jam or start the canning process, it’s very important to first sterilize your jars. This insures there is no foreign bacteria, yeasts or fungi in the jars which could infect the food inside potentially causing sickness. Sterilizing is a quick process that should never be omitted.
- Set screw bands aside. Wash mason jars, and sealing disks with warm soapy water. rinse well.
- Place the number of required jars on a canning rack in a large stock pot.
- Fill the stockpot and jars with water and heat to a simmer. (180F/82C) Simmer for 10 minutes.
- Heat sealing disks and screw bands in hot water, not boiling.
- Keep jars and lids hot until ready to use.
How do you do a water-bath for canning?
For a beginner; making Jam can be intimating especially when it comes to the canning process. Once you realize how easy it is, you will never want to buy store bought jam again.
- Once you have filled your jars up with Jam, its time to start the canning process. Wipe the rim of your jars with a clean cloth to remove any food residue. Place the sealing disk on the jar, and screw the band on fingertip tight.
- Place a canning rack inside your large stock pot. in this case; I used the rack that my instant pot came with. The purpose of the canning rack it to prevent the jars from bouncing around the bottom of the pot which can cause breakage.
- Place the jam filled Jars on top of the rack. I can usually fit 6 of the 250 ml jars in my stock pot. If you can’t fit 6, you may need to process the water-bath in a couple a batches.
- Add enough water into the stock pot to cover the jars you are processing. Place the lid on your stock pot. (The lid keeps the heat and splashes inside the pot.)
- Bring the water to a rolling boil.
- Once the water is boiling, set your timer to the appropriate time depending on your altitude with a minimum time of 10 minutes. See chart below.
- When the processing time us up, turn off the heat and let the jars sit in the water for 5 minutes to cool slightly.
- Remove jars from the pot using a jar lifter, and place on a solid heat resistant surface. Like a wood cutting board.
- Leave the jars undisturbed for 12-24 hours. you will hear a pinging sound as the lids flex and seal. This is normal.
- After the cooling period, test whether the jars have sealed correctly by pressing down on the lids. if they sealed; they will feel solid when you press on them. If any lids fail, refrigerate the contents and consume promptly.
- Store your jars in a cool dark place for up to 2 years.
Water-bath altitude adjustments
At altitudes of 1,000 ft. it requires 10 full minutes of boiling time for safe preserving. At altitudes higher than 1,000 ft. increase processing times as indicated in the below chart.
| Altitude in Feet | Increase Processing time |
| 1,001 – 6,000 | 10 Minutes |
| 6,001 – 8,000 | 15 Minutes |
| 8,001 – 10,000 | 20 Minutes |
Saskatoon Jam
Prep Time 30 Min | Cook Time 10 min | Yield 6 Jars
INGREDIENTS
- 4 cups Saskatoon berries
- 3 1/2 cups granulated sugar
- 1 Tbsp lemon juice
- 1 package (57g) classic pectin
- 1 tsp margarine or butter (optional)
DIRECTIONS
- Prep and sterilize 6 small canning jars (250ml jars)
- Wash and dry saskatoon berries.
- In a large stock pot over medium heat. combine berries, lemon juice, water, classic pectin and margarine or butter (if using). and bring to a boil. (berries will release juices as it cooks)
- Using a potato masher; breakdown some of the berries to the size and consistency of jam you would like.
- Add in sugar stirring constantly until dissolved; brining it to a rolling boil that cannot be stirred down.
- Boil hard for 1 minute.
- Remove from heat, and pour into prepared sterile jars leaving 1/4″ at the top of the jar (headspace)
- Wipe rim of jar clean to remove any food residue, place sealing disk on the jar, and screw band down fingertip tight. Repeat for remaining jars.
- Follow with water bath.

Recipe Notes
Butter. When you add pectin to your jam; you will immediately notice your jam will start to foam. The purpose of adding butter to the recipe helps prevent foaming. Adding the butter is optional. If you do not add the butter, you may need to remove the foam from the top from the jam before filling your jars.
Sugar. Sugar is essential to gel formation. use ALL sugar specified in the recipe, do not reduce.
Recipe Doubling. Most experienced canners will warn you that its not a good idea to double your recipe. If you double the recipe there is risk that it will fail on you. The Jam wont cook as effectively. If you double the recipe, you double the cook time as there is more product to cook and breakdown. When it comes to jams; faster cooking leads to fresher tasting, better textured jams. its far better to make two smaller batches than it would be to try and double the recipe.
